7 Tips for Buying a Plastic Injection Molding Machine
Buying a plastic injection molding machine is a production decision, not merely an equipment purchase. The wrong choice can create uneven parts, excessive scrap, and costly downtime. A machine may look impressive while failing your actual material, mold, or output requirements.
This guide presents seven practical tips for evaluating machines with greater confidence. It examines clamping force, injection capacity, control systems, energy use, maintenance access, supplier support, and total ownership cost. Experienced molders usually begin with part dimensions, resin behavior, cycle time, and expected annual volume. These details matter more than a polished sales brochure. A small trial with your actual material can reveal problems that specifications hide.
Ask direct questions. Request service records, test samples, and clear warranty terms. Check whether local technicians can respond when production stops. Also compare hydraulic, hybrid, and electric designs under your working conditions. Electric models may offer clean operation and repeatability, but their purchase price can be higher. Hydraulic equipment may provide familiar maintenance, yet energy consumption deserves careful review.
No buying guide can replace a technical assessment of your factory. That is the uncomfortable part. A machine selected from general advice may still perform poorly with a difficult mold or unstable resin. Use these tips as a disciplined starting point, then verify every assumption with qualified engineers, documented trials, and realistic cost calculations. Reliability begins before the purchase order.
Define Output Needs Across the 50–4,000+ Ton Machine Range
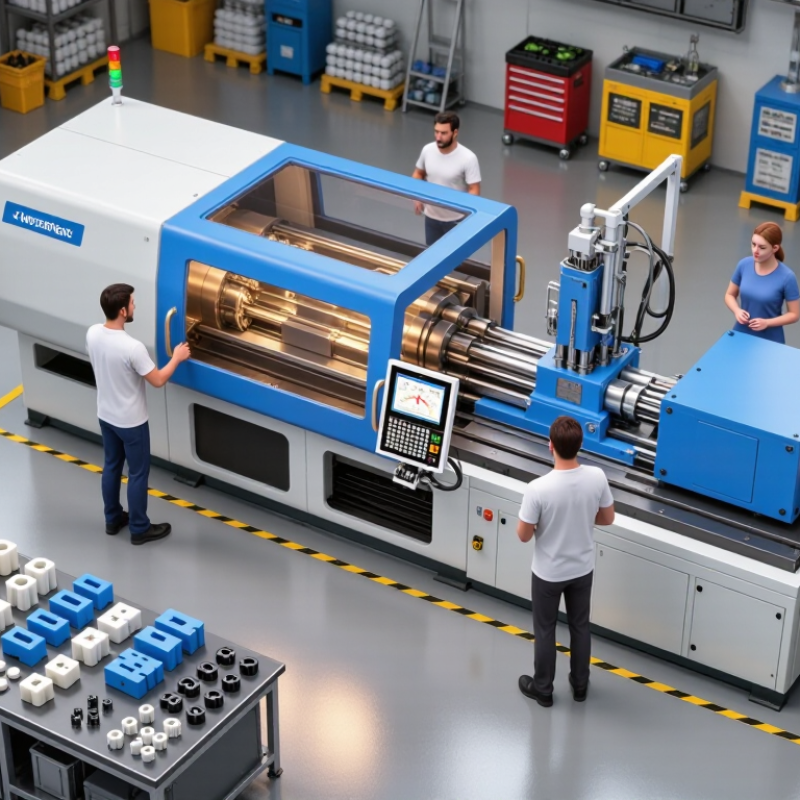
Buying an injection molding machine starts with output, not a catalog number. Define the part weight, cycle time, cavity count, and expected annual volume. A small 50-ton machine may suit thin closures or compact components. Larger housings may require 500 tons or more. Parts with wide projected areas can demand 4,000+ tons. Clamp force depends on projected area, cavity pressure, and material behavior.
Tip two is to calculate injection capacity carefully. The shot size should exceed the total part and runner weight without operating at its limit. Tip three is to check mold dimensions. Measure mold height, daylight, tie-bar spacing, and ejector stroke. A mold that fits on paper may still restrict maintenance access. It happens.
Material selection changes the decision. Glass-filled polymers need strong wear protection and stable processing control. Heat-sensitive resins may require accurate temperature management and short residence times. Tip five is to compare cycle estimates with real production conditions, including cooling time and operator handling. A fast cycle is useless if parts warp or require frequent adjustment.
Consider automation, floor space, power demand, and technician access. These factors often separate a practical 300-ton machine from an oversized 1,000-ton purchase. Tip seven is to evaluate service response, spare-part availability, training, and documented performance data. Ask for trials using your mold and resin. Review rejected parts, energy readings, and cycle stability. A spreadsheet can still lie. Allow capacity for growth, but avoid paying for unused tonnage.
Calculate Clamp Force Using the 2–5 Tons per Square Inch Rule
The 2–5 tons per square inch rule offers a practical starting point when selecting a plastic injection molding machine. Calculate the total projected area, including cavities, runners, and sprues, from the clamp direction. Then multiply that area by the expected tonnage factor.
For example, a mold with a 12-by-8-inch projected area covers 96 square inches. At three tons per square inch, the estimated clamp force is 288 tons. A machine rated near 300 tons may appear suitable, but the calculation is not a guarantee. Resin type, mold design, filling speed, wall thickness, and processing temperature can change the required force.
Measure the shadow.
Experienced technicians usually add a reasonable safety margin after checking the material supplier’s processing data. Too little force may cause flash along the parting line. Too much force can increase mold stress, hide venting problems, or accelerate wear. During shop trials, record injection pressure, flash location, cycle time, and part weight. These details often reveal mistakes in the original estimate.
The rule is useful, but imperfect. A complex mold with thin walls may need more force than a simple calculation suggests. Conversely, a low-pressure application may not require the highest multiplier. Recheck the projected area carefully; overlooking a large runner can distort the result. A practical machine choice balances calculated tonnage, available platen space, tie-bar clearance, and actual production evidence.
7 Tips for Buying a Plastic Injection Molding Machine - Calculate Clamp Force Using the 2–5 Tons per Square Inch Rule
Estimated clamp-force range based on the projected mold area. Formula: Projected Area × 2–5 tons/in².
| Example Part Category |
Projected Area (in²) |
Low Estimate
(2 tons/in²) |
Typical Estimate
(3.5 tons/in²) |
High Estimate
(5 tons/in²) |
Suggested Machine Class |
| Small cap, clip, or fitting |
10 |
20 tons |
35 tons |
50 tons |
40–60 tons |
| Small housing or consumer component |
25 |
50 tons |
87.5 tons |
125 tons |
100–150 tons |
| Medium container or appliance component |
50 |
100 tons |
175 tons |
250 tons |
200–250 tons |
| Large panel or structural component |
75 |
150 tons |
262.5 tons |
375 tons |
300–400 tons |
| Large enclosure or automotive-style part |
100 |
200 tons |
350 tons |
500 tons |
400–550 tons |
| Extra-large housing or tray |
150 |
300 tons |
525 tons |
750 tons |
600–800 tons |
| Very large structural component |
200 |
400 tons |
700 tons |
1,000 tons |
800–1,100 tons |
Selection notes:
Measure the projected area of the complete shot, including all cavities, runners, and sprue. The 2–5 tons/in² rule is a preliminary sizing guideline; the final choice should also consider resin type, part thickness, injection pressure, mold design, filling speed, and the machine's available platen space and tie-bar clearance. Select the next standard machine size when the calculated requirement falls between available machine ratings.
Match Shot Size by Using 20–80% of Barrel Capacity
When buying a plastic injection molding machine, match the shot size to your real production needs.
A practical target is 20–80% of the barrel’s rated capacity. This range gives the screw enough travel for stable melting and repeatable injection.
Calculate the complete shot, not only the finished part. Include the runner system, sprue, and a small cushion behind the screw. A 45-gram part may require 58 grams after runners and process allowance. Check how the manufacturer rates shot size, because specifications often use a standard material density. Your actual resin may weigh more or less.
Avoid operating near the barrel’s limits. Very small shots can leave material in the barrel too long, causing discoloration or property changes. Very large shots may reduce cushion and make pressure control difficult. I have seen good-looking samples fail later because the calculation ignored runners. That mistake is common.
The 20–80% guideline is useful, but it is not perfect. High-temperature materials may need a narrower operating window. Recycled content can also change flow and weight. Test the machine with your actual mold, resin, cycle time, and shot weight before purchase. Record cushion movement, injection pressure, and melt temperature during trials. Small variations matter.
Compare Hydraulic, Servo-Hydraulic, and Electric Energy Demand
When buying a plastic injection molding machine, compare energy demand under real production conditions. Hydraulic machines often keep the pump running, even during cooling and mold opening. This creates steady heat and higher electricity use. They may still suit demanding applications where purchase cost and rugged operation matter more than efficiency.
Servo-hydraulic machines adjust pump speed according to movement and pressure needs. During a factory trial, this difference is visible on the power meter. The motor slows during cooling, then responds quickly during injection. Energy savings depend on cycle time, material, mold design, and operating pressure. A machine running below capacity may not achieve the advertised reduction. That detail is easy to miss.
Electric machines use separate servo motors for injection, clamping, and other movements. They usually consume less energy during pauses and produce less hydraulic heat. Their cleaner working area can also reduce cooling-system demand. Ask suppliers for measured kilowatt-hours per production cycle, not only installed motor power. Check the same mold, resin, shot size, and cycle settings. Compare peak load as well as average use. Small differences become expensive across three shifts. My earlier assumption was simple: electric always wins. Real production proved more complicated. Maintenance, operator habits, and idle time can change the result. Record energy data for several days before making a final decision.
Verify Safety and Controls Against ISO 20430 Requirements
7 Tips for Buying a Plastic Injection Molding Machine
Safety should be checked before cycle time, clamping force, or energy consumption. ISO 20430:2017 defines safety requirements for injection moulding machines, including guards, interlocks, emergency stops, and control systems. Ask the supplier for the current risk assessment and conformity documentation. Do not accept a generic certificate alone. Inspect the machine physically. Open the mould-area guard and confirm that the machine stops without dangerous delay. Test the emergency stop, reset function, and access doors under realistic operating conditions. Short tests matter.
Controls deserve equal attention. ISO 20430 expects safety-related control functions to reduce foreseeable risks during automatic, manual, setup, and maintenance modes. Check whether mode selection requires deliberate action. Verify that stored hydraulic, pneumatic, electrical, and thermal energy can be isolated safely. The U.S. Bureau of Labor Statistics reported that contact with objects and equipment caused 22.5% of nonfatal workplace injuries involving days away from work in 2022. That figure is broader than plastics manufacturing, but it shows why guarding cannot be treated as paperwork.
Ask for fault-response records, software validation information, and maintenance instructions. A control panel may look modern while hiding weak diagnostics. That is easy to miss. Confirm that alarms identify the failed function, not merely “system error.” Review operator training materials with an experienced technician. Small gaps appear there. ISO alignment is valuable, but it does not replace a site-specific assessment covering floor space, mold changes, cleaning, and foreseeable human mistakes.
7 Tips for Buying a Plastic Injection Molding Machine: Verify Safety and Controls Against ISO 20430 Requirements
The chart shows an editorial purchase-review weighting for seven practical checks commonly used when assessing an injection molding machine. The percentages indicate relative decision priority, not an ISO 20430 compliance score. Buyers should request documented evidence, test safety functions during acceptance, and confirm that the machine-specific risk assessment and operating instructions are complete.
Reference framework: ISO 20430, Plastics and rubber machines — Injection moulding machines — Safety requirements.